
Z-Height

Z-Height

Caps Mode

Toolbar Button
(For more information, see Toolbar Styles below.)
 SYS-STD Style Toolbar (Click on image for larger view in pop-up window) |
|
|
 SYS-ALT Style Toolbar (Click on image for larger view in pop-up window) |
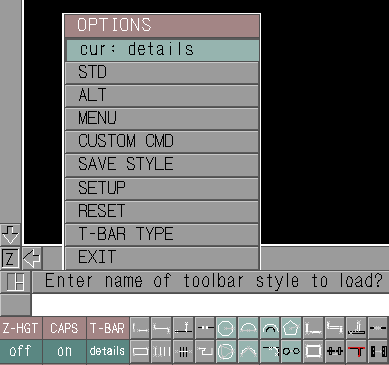
T-BAR Toolbar Style Prompt
A few important things to keep in mind are:
![]()
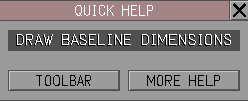 Typical QUICK HELP Menu |
Click on the TOOLBAR button and ARRIS++ will prompt:
Click on the desired toolbar box and the command will be assigned to that location along with the corresponding ikon or text label.
Take note of the following two points which describe powerful
features for placing commands on the toolbar that can greatly
speed up the creation of custom toolbar styles.
![]()
Alternately, from the QUICK HELP menu, the MORE HELP button may be selected to display the EXPANDED HELP pop-up menu.
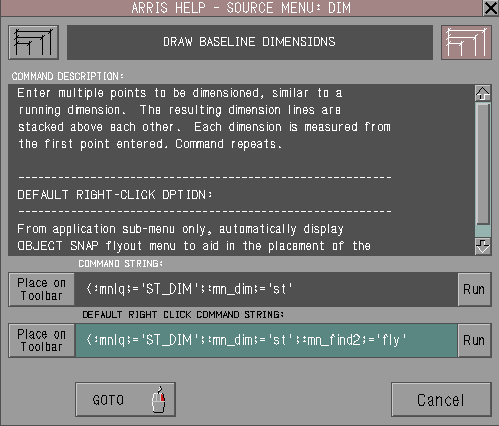 Typical EXPANDED HELP Menu |
Here, the menu box ikon or label text is shown and the left and
right-click commands may be reviewed in detail. Selecting either
of the PLACE ON TOOLBAR buttons will allow the corresponding
command to be placed on the toolbar as described above.
![]()
Click on the desired box and the TOOLBAR BUTTON CUSTOMIZATION pop-up menu is displayed:
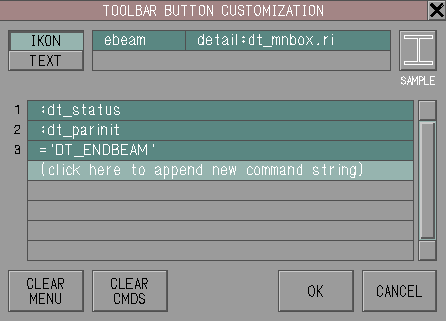 TOOLBAR BUTTON CUSTOMIZATION Menu |
Use this menu to modify or completely replace the current command assigned to the toolbar box.
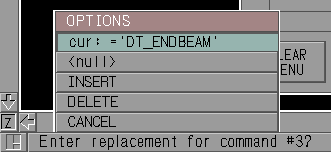 Command Customization Prompt |
The selected component may be replaced by typing in a new command string. Selecting DELETE erases the command altogether while INSERT allows a new command string to be placed immediately in front of the selected component. Sometimes an empty or null argument is required in a command string. Use <null> to add this component.
Note that complex command strings with one or more semi-colons may be entered at the prompt, but the string will then be broken into its parts when displayed on the menu's command list.

Toolbar Style: none
This is done as a reminder that the current foreground
configuration has not yet been saved. To save the layout click
on the T-BAR box and select the SAVE STYLE option.
ARRIS++ will prompt:
![]()
Type in the desired style name, from one to eight characters in
length, and the toolbar layout will be saved in a file named
ik_<style>.st in the
USR:config.dir directory so that it can be
reloaded at any time.
![]()
USR:config.dir directory. The script
will not run from any other location.
${ARRIS}/ap/cjsa.vn/cjmenus.ap/bin/cj_mktb
A message will be displayed for each existing toolbar style
found in the mn_ik.sf file that is converted to the
ARRIS++ format and stored in a new
ik_
| Color | White | Black | Grey |
|---|---|---|---|
| Number | 115 | 116 | 127 |
| Command to Set |
$setvar(#fcol, 115)
|
$setvar(#fcol, 116)
|
$setvar(#fcol, 127)
|
| Description | Used to indicate new entities | Used to indicate existing entities | Used for construction information |
When creating RIs using these three colors, it is impossible to see the work if the screen background is either black or white. To solve this problem, temporarily set the background color (color #0) to some other value. This can be accomplished with a command such as:
$cols(0, 38, 113, 118)
To facilitate ikon creation, each of these commands have been
included in the Toolbar Command Database
under the command group titled ARRIS++: MENUS for easy
placement on the toolbar.
![]()
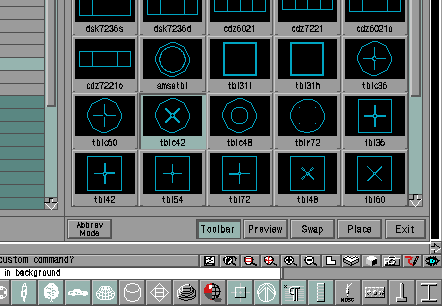
Partial REPEATED ITEM SELECT Menu shown with TOOLBAR
|
Navigate to the appropriate library or catalog and highlight the desired RI by clicking once on its name or image. Select the TOOLBAR button at the bottom of the menu and then choose the button on the toolbar where the ikon is to be located.
Note that this operation only changes the button label image. The current command assigned to that button is unaffected by this operation. To change the button's command refer to the manual section titled Toolbar Style Creation.
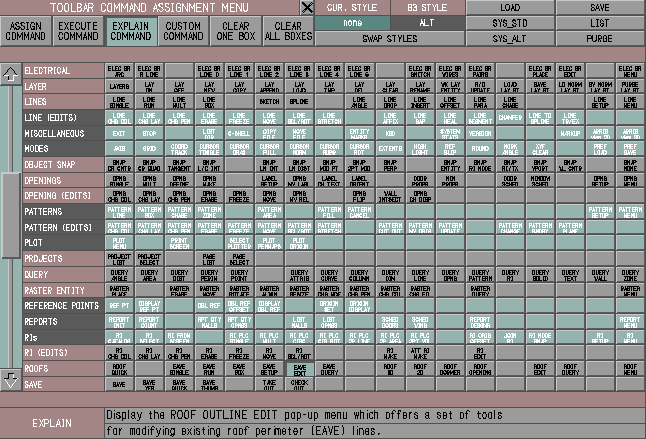
The TOOLBAR COMMAND ASSIGNMENT menu
(Click on image for larger view in pop-up window)
This menu provides a convenient means for quickly creating new toolbar styles. There is detailed on-line help available for all boxes. Here is a quick review of the menu's main features.
| ADMINISTRATION | APPS (LOAD) | APPS (MENUS) | ARCH ELEMENTS | ATTRIBUTES |
| CEILINGS | CEIL (FIXTURES) | COLOR | COPY | CURVES |
| CURVES (EDITS) | DATABASE | DIMENSIONS | DIM (EDITS) | DISPLAY |
| DISPLAY LIST | DRAWINGS | EDIT (SINGLE) | EDIT (ALL IN) | EDIT (SOME IN) |
| EDIT (MISC) | ELECTRICAL | LAYER | LAYER (EDITS) | LINES |
| LINES (EDITS) | MISCELLANEOUS | MODES | NOTES | OBJECT SNAP |
| OPENINGS | OPENINGS (EDITS) | PATTERNS | PATTERNS (EDITS) | |
| PLOT | PROJECTS | QUERY | RASTER ENTITY | REPORTS |
| RIs | RIs (EDITS) | ROOFS | SAVE | SCREENS |
| SHEETS | SLABS & PATHS | SOLIDS | SOLIDS (EDITS) | STAIRS |
| STATUS REPORTS | STRUCTURAL | TEXT | TEXT (EDITS) | TRANSLATION |
| STATUS REPORTS | WALLS (TOOLS) | WALLS (EDITS) | WORKPLANE | UTILS |
| VIEW | VIEWPORT | ZONE | ZOOM | ARRIS 3D |
| ARRIS DETAILS | ARRIS SITE | ARRISplus | ARRIS++: COLORMAP | ARRIS++: DOCS |
| ARRIS++: DRAWING | ARRIS++: MACROS | ARRIS++: MENUS | ARRIS++: MISC | ARRIS++: POINTS |
| ARRIS++: PROGRAM |
${ARRIS}/ap/cjsa.vn/cjmenus.ap
directory.